Getting Ready To Thread The Bobbin

tread the bobbin

After setting up your sewing machine, it is now time to thread. Threading is typically a simple and quick process provided if you know the knack of doing it. Though the process seems daunting, believe me, with practice you will be able to thread your machine in no time. During the initial stages, you will consume a lot of time for threading your machine. But don’t worry you will master the techniques soon. It is important to go through the manual before beginning the process. To begin with, understand the basic principles of threading. There are two different thread sources to facilitate sewing.

The spool of thread purchased from shops features above the sewing machine, and this is used to thread the empty bobbin. The bobbin with the thread is fitted below. There is a prong that sticks atop your sewing machine which is termed the spool pin. Position the spool of thread on top of the spool pin. While most spool pins twig outwards, a few remain popped up to the left side. They avail a cover made of plastic to accommodate the spool of thread. The thread comes out through this spool pin to facilitate sewing. Now coming on to the technique to thread the bobbin.

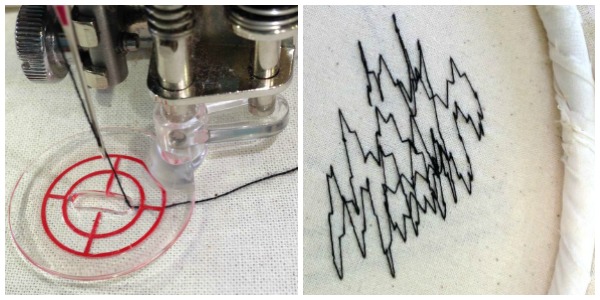
There is a small hole within the bobbin through which the thread is wrapped for quite some times. The thread then unravels from the backside. Make sure to position the bobbin with the thread above the bobbin winder. It has to be secured by flicking the stopper present adjacent to it. It is now time to switch on your machine. It is essential to hold the thread that sticks out from the bobbin for three seconds. Transfer some of the thread from the spool to the bobbin as you press down. You have to keep doing the process until the bobbin is filled with thread.

Stitching The Zigzag Way To Finish Your Seams

zigzag stich

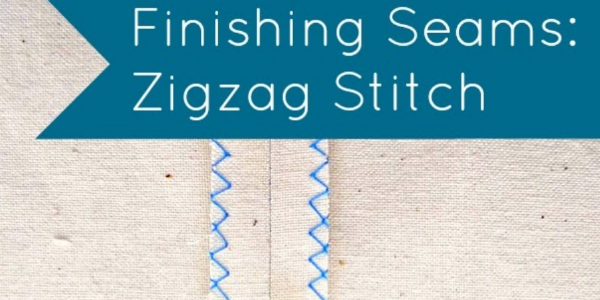
It is imperative to learn the patterns of zigzag stitching to offer a quality touch to your sewing project. The zigzag stitches shall avail a tidy and ordered look to your seams. It also prevents the garment from tattering and unraveling. You can complete the zigzag stitching within a few minutes of time. It is a fantastic option to explore owing to its simple attributes. The stitches can be turned purposeful when you have to finish without overlocking. You can always opt for an overlock foot to simplify your stitching. The little metal flap of the overlock foot aligns the fabric and the stitching procedure.

Now let’s move on to the practical part. Begin stitching the seams in the usual format. As you finish, cut them. But make sure to avail a few mm space to lodge the zigzag stitches. Then to begin the zigzag stitches, it is essential to customize your sewing machine. For the setup, position the overlock foot on the sewing machine. Carrying out a trial run is necessary. Assess the tension and width of the stitches during the test run. Refer to the manual to make appropriate changes. As the fabric edge touches the metallic flap of the overlock foot, begin stitching along the first seam.

Sewing on a sheer, lightweight fabric requires a more careful approach. You can either opt to sew both the seams aligned together as a single unit or stitch them distinctly. The right-side end of your zigzag stitch must touch the fabric’s edge. Never back tack at both the ends. Instead of back tacking, you can connect the loose ends of the threads with a double knot. Ensure a double knot at both the ends to secures your stitches. Then trim away the excess threads. Finally, it is time to press the seams based on the pattern you have stitched. So, here you complete the seams in the right way.

Essential Sewing Lessons For The Beginners

sewing classes

For all the beginners out there, it is essential for you to know the common mistakes that feature when you use the sewing machine for the very first time. The blunders that you face allows you to learn more. But, never repeat your mistakes. Several small things can interfere with the proper functioning of a sewing machine. Be vigilant when you handle the sewing machine. Make sure to familiarize the basic concepts to acquire a precise knowledge. The frequent problems that you face during sewing can be solved by yourself with a little technical know-how. Keep your manual handy for solving your doubts.

As you begin sewing, the first problem that tests your patience is the thread that falls from the needle. To fix this errand, pull out a few inches of thread from the needle before you sew. It is simple enough. Make sure to check the placement of your needle. It has to remain in the highest position. You can rotate the handwheel to position the needle on top. You can also lift the lever upwards to get the needle higher. The up-down button on the sewing machine also helps solve the purpose. Moving on to handle the jiggling fabric, the next significant concern.

The material that does not remain in its place as you sew could be one of your biggest concern. Don’t worry, and it can be resolved quickly to ensure neat stitching. As you start sewing, lower the presser foot to hold the garment in position. Coming on to uneven stitching, if your stitches appear tight on one side and absurd on the other, do not blame your sewing machine. Rather, adjust the tension dial. Carry out a trial run on another piece of cloth until you get even stitches. If that doesn’t work, re-thread your bobbin and insert it again. Make sure that the thread from the bobbin unwinds in an anticlockwise direction. Hope, these simple tips help you kick start your sewing projects with ease.