Inserting A Sleeve In Few Easy Steps

easy to sew -sleeve

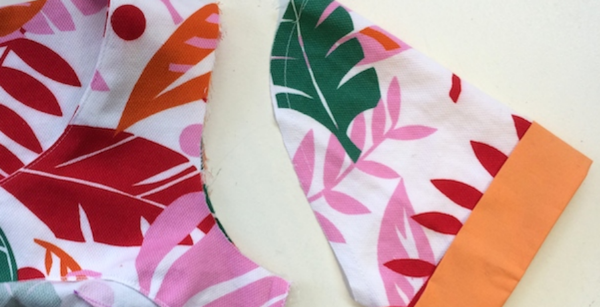
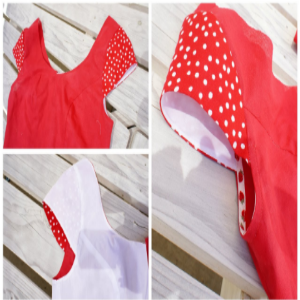
As you step on to the advanced sewing levels, the first thing that comes to your mind is attaching a sleeve to the garment. There are several methods to insert a sleeve, however adopting exemplary methods enable you to offer a professional touch. The Mathilde Blouse pattern provides wholesomeness at the armhole. It is one of the renowned sewing patterns that is practiced widely. You can also utilize this method to attach sleeves to your various other projects. Before getting on the machine, it is essential to understand the basic concepts involved. The Mathilde method grants a wholesome approach to support the curves of the fabric.

The sleeves are given a unique look as it stands distinguishably. Most often, the sleeve head remains bigger, say about two centimeters larger than the opening for the arms. But in the case of the Mathilde blouse, space is even greater. An enlarged area adds more details to the design. Make use of this excess garment to add volume. Gather the extra fabric at the sleeve’s circumference and align it with the armhole during sewing. Now, with the additional size you can sleek in your shoulder better. If this style of stitching does not fascinate you, don’t worry there is an alternate route.
sleeve1

You can also insert sleeves in a similar pattern that is followed in your shirts and tee shirts. The sleeves can be attached in a flat position that remains against the opening for the arm. You can then join the side seam of the body with the underarm of the sleeve. It is now time to thread your machine to begin sewing. Mark a starting and finishing point at different notches of your fabric. Start stitching three rows that remain parallel. Leave appropriate spaces between the three rows. Never overlap with the seam lines and there you attach your sleeves comfortably well.

Read also – Familiarizing Yourself With The Know-Hows Of The Sewing Machine

Familiarizing Yourself With The Know-Hows Of The Sewing Machine
sewing machine

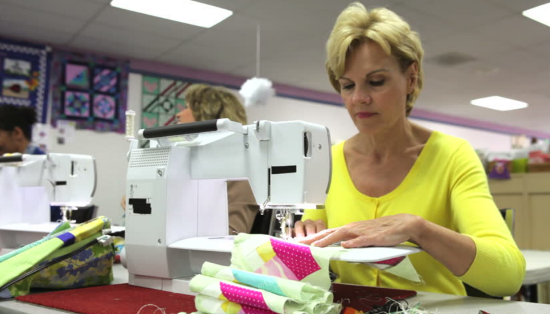
Before you begin sewing, it is imperative to set up your sewing machine in the right directives. Three essential steps feature during the arrangement of your sewing machine. They are plugging to a suitable power supply, considering the positioning of the needle and inserting the presser foot. All sewing machines do not carry the same setup, so it is necessary to refer to your manual as and when required. Fixing the parts in a proper sequence is important. It is important to remain vigilant during the setup process. Let’s now look through each of the steps in detail.

Make sure to dust your sewing machine if you have not used in the recent past. Then plug in the different sources based on the model of your sewing machine. First and foremost, connect the cable and the power socket to your sewing machine. If the pedal of the machine has a separate lead, then plug it on separately. Check out for the comfort in a sitting position by placing the pedal on the ground. Then, we move on to the next step. Check the needle, if it’s already in place, your work is done. Choosing needles based on the fabric is necessary.

sewing_machines_

To change the needle if it snaps, first get rid of the broken needle. As you turn the small knob to the right side, the needle can be removed. For inserting a fresh needle, push the new one into its place and screw the knob back. It is now time to setup the presser foot. There are different types of feet available to suit different purposes. A standard one would just do the trick for you. Use the lever on the right side of your machine to raise and lower the presser foot. Position the feet straight below the bar. Make sure to align the feet until it fits in perfectly. Then, switch on the machine to begin sewing.

Read also – To Sew Stuffs In A Jiffy

To Sew Stuffs In A Jiffy

sewing1

Most often all of us are hard pressed for time. When you are only left with a few hours to sew a garment, you cannot keep stitching at your speed. It is imperative that you know some useful tricks to help you stitch faster. When you face a time crunch, it is necessary to let go the pins. You can combine the initial seams together to begin sewing. Then quickly bring in the edge of the fabric as you stitch. And when you think you require a break to align the seams, make use of the hand wheel. Do not alter the sewing line. As you learn this trick, you will completely forego pins.

Though stitching might look simpler, it involves many numbers of steps. It encompasses aligning, stitching and trimming the thread accordingly. The presser foot has to be raised and lowered appropriately. And finally, the garment must be adjusted several times based on your stitching. To save the time involved in all these practices, consider chain stitching. You do not have to halt and resume in-between. You can also join several fragments at a stretch. As the first seam comes to an end, you can continue to sew by feeding another one until you come to a close. Then press all the seams together, and you’re done within a few minutes of time.